It's been a few weeks since the last post about my 1/10 scale model of Tally Ho. A good part of this was spent on long overdue maintenance of my CNC milling machine which, after playing up in irritating ways for a while, burned out a motor. I thought it would take a couple of days to disassemble, clean and reassemble but it took 2 weeks! Then the computer that drives it failed; having sourced a new PC the keyboard failed. It's working now - here's a photo of the mast crane for the throat halyard.

The spars now have several coats of varnish, here they are hanging in the sun.

I did some temporary rigging and still have a way to go but the mast is standing.


Here's a photo of the boat with sails. Again their rigging is all temporary. bits of wire and string holding them in place, but with a fan providing a breeze they look OK and as if they will move the boat along.

In the left hand photo above there are three servos with arms. The aft one is for the rudder; a lime from each end of this arm pull the tiller to port or starboard. The forward one is for the jibs; lines from this will pull in the sheets for the two foresails. The centre servo will operate the mainsheet. Lines from the servos arms will pass through tubes in the deck. Testing shows that the rudder and foresails will work but there are two problems with the mainsheet. With a fan blowing on the mainsail (approximately 7 or 8 knots of breeze) the servo struggles to pull in the sail. With no breeze to take the sheet out it falls in a heap and gets tangled. As an alternative to the arm winch I set up a drum winch with an endless loop around a pulley.

Here area couple of short videos of this working, first with wind and then with no wind. The blue line is the mainsheet. with wind on the sail the sheet runs out nicely and the winch can pull the sail in.

A better solution is to have a winch that doesn't let out the mainsheet unless there is tension on the sheet. A mechanism like this is described in the Jolie Brise pages. This is more time consuming to make and so I will try the endless loop approach described above first.
Because the model will be heavy I've been working on a trolley to move it around. I will need ramps to get it up and down onto the work bench and into my vehicle. Here it is raised up so I can work on it. The mast will need to be lowered when moving the boat on the trolley and there is barely enough room to raise the mast under the workshop ceiling!

While waiting for the paint to dry on the trolley I spent some time making blocks. All single blocks for the time being, some with working sheaves and some "dummies" for appearance. Here's the prototype dummy block.

The blocks have been varnished and here's a group photo with the sheaves waiting for the varnish to harden up a bit before assembly.

 I've also been working on some turnbuckles. Here's the prototype. The body is turned from a 40 mm long piece of hexagonal brass bar The threads are 3mm diameter and 3mm taps are short so I drilled a 3.5mm hole 35mm from one and and then silver soldered a 5mm long plug in the open end of the hole. Now the ends of the body can be drilled and tapped for the 3mm screws, right hand thread one end left hand the other.
The screws shown here are turned from 6mm square bar turned down to 3mm and threaded, again left and right hand. Holding the square end in the lathe chuck and turning it down to 3mm is tedious and quite difficult. Cutting a slot in the outer end if the screw defeated me, I couldn't work out how to hold it securely enough.
The solution was to cut the slot in the end of the bar stock first and then cut off the piece with the slot and drill and tap it for the screw. A length of threaded rod was then screwed in and silver soldered.
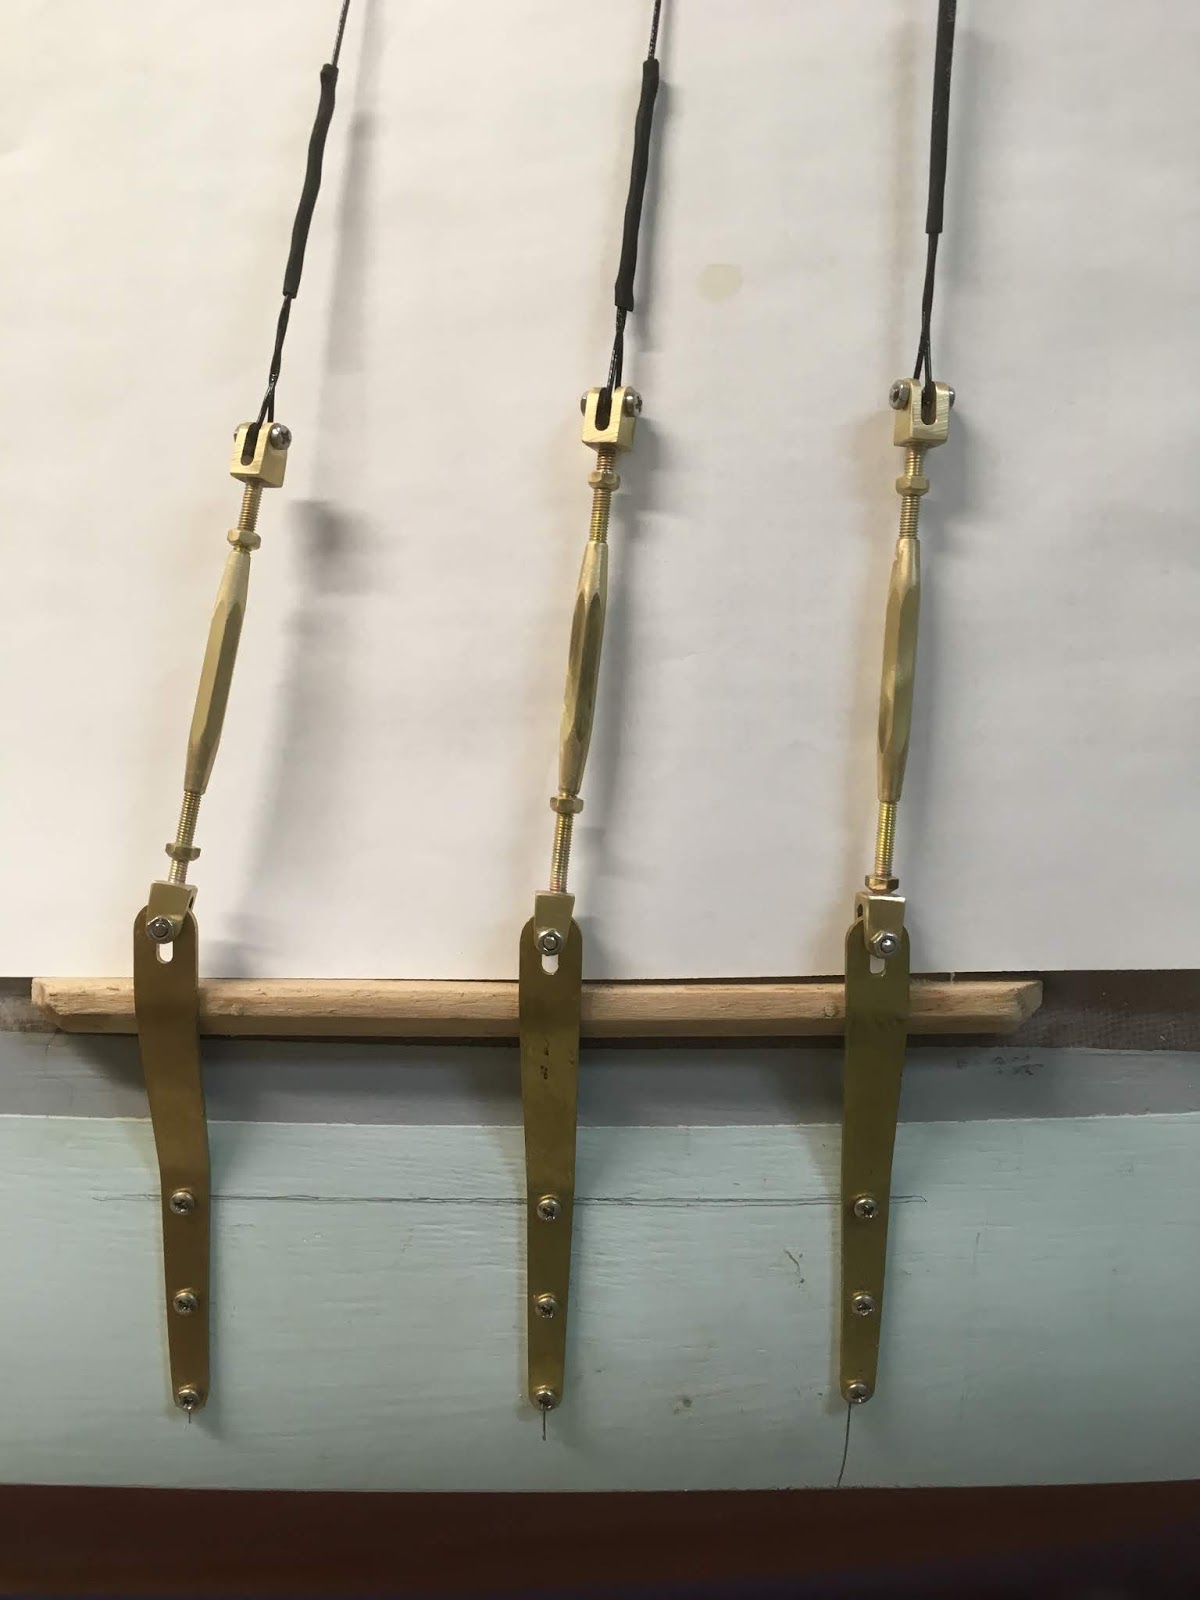
Here are some of the finished turnbuckles. The shrouds and forestay are nylon coated fishing trace wire; I think it looks a bit thin (a bit under a millimetre) but the mast won't fall down!